


Craft Along – Origami Bookmarks
For the second week in our “craft along” series, we’re going to be making some super satisfying origami bookmarks! These are so fun and quick to make, and all you need is some paper! Patterned paper works best, but you could use plain paper and decorate yourself with stickers or coloured pencils/pens!
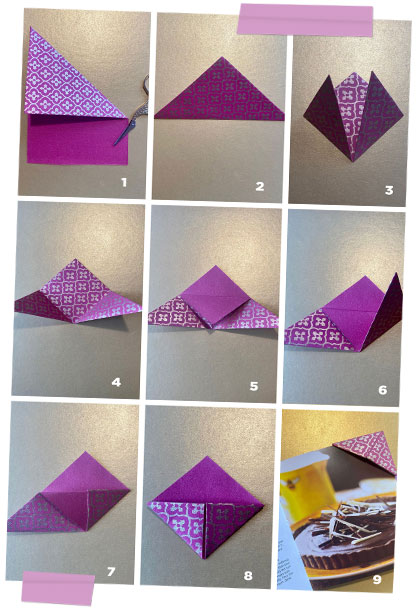
Simple Bookmark
1. Create a square piece of paper by folding over and cutting off the excess.
2. Rotate your triangle so the flat edge is at the bottom and the corner is pointing up.
3. Fold the bottom left and right corners up to meet the top corner and crease.
4. Once creased, fold these corners back down.
5. Fold down one of the sheets from the top corner and crease.
6. Fold the bottom right corner back up, as in step 3.
7. Fold over the point of this triangle, and tuck into the fold you created in step 5.
8. Repeat with the other side.
9. It’s that simple! Slide over the top corner of your book as shown to keep your place!
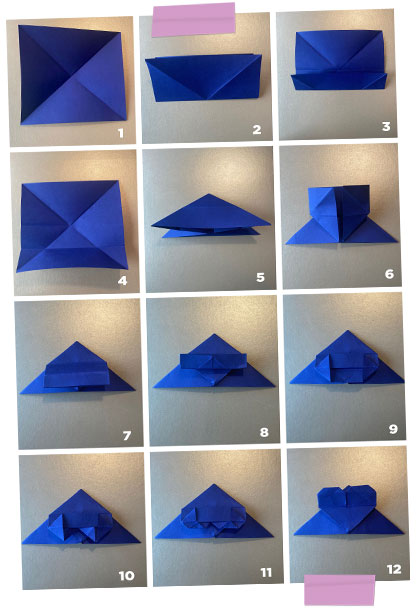
Heart Bookmark
This is a little bit more complicated than the simple bookmark, but with a bit of practise you’ll be making them in no time! You might want to start off with a slightly larger piece of paper than with the “simple bookmark”, as there are a few fiddly folds!
1. Start with a square sheet of paper and make diagonal folds.
2. Turn over the paper and make a horizontal crease.
3. Make another crease by folding the bottom edge up to meet the centre.
4. Open back out into a square.
5. Push in gently on the creases to collapse the paper square into a triangle – this is known as a “balloon base” and is used as the base of lots of origami!
6. Lift the top layer of the triangle upwards, following the crease and flatten this down
7. Fold the flap downwards.
8. Lift the bottom flap, fold in half and crease.
9. Open the flaps up and crease.
10. Fold in the small sides of the triangle to create the “points” of your heart (this will be an upside down heart at this point!)
11. Fold the very bottom tips up to “round off” the top of your heart.
12. Life the entire flap upwards – this will create a heart shape and your bookmark is complete!
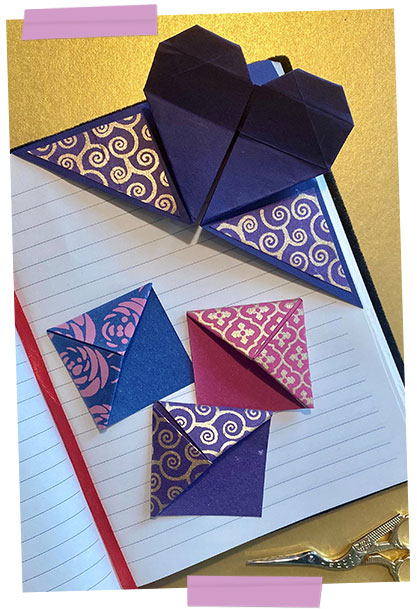
Experiment with different patterned papers! You could decorate with stickers, or by gluing on pieces of paper in a different pattern, as we’ve done with the heart bookmark!
As well as using as a traditional bookmark, they would also look really pretty decorating the corners of your scrapbooks or photo albums.
We can’t stop making these – they’re just so simple and satisfying to create!